Easy and Inexpensive Tips for Better Video Meetings

BadVideoInMonitor

So there you are, trying to video conference with the a client, vendor, investor, or mom and your video feed, well…. stinks. Nothing makes a bad impression like a bad impression.  I recommend that you always test your video setup a couple hours before you need to go live, making sure your webcam is working and the picture looks good. And just in case you need to call your tech support team or fix it yourself. Here are some basic and straight-forward things you can do to make sure a working system performs well.


Keep it clean!

Lens cleaner and microfiber are your friend. Get a cleaning kit from your local optician and keep your web-cam clean. Spray solution on the microfiber NOT on the camera. Gently remove junk and dust. The lens on your webcam is super tiny, so even a small spec of dust, lint or hair can have a major impact on image quality. Finger prints are worse, and can make your video look like it was shot through plastic bags – yuck. Leave the soft focus effect to Glamour Shots.

Can they hear you over all that noise?

Use a separate mic and turn off sources of background noise. The built-in mic on your laptop will
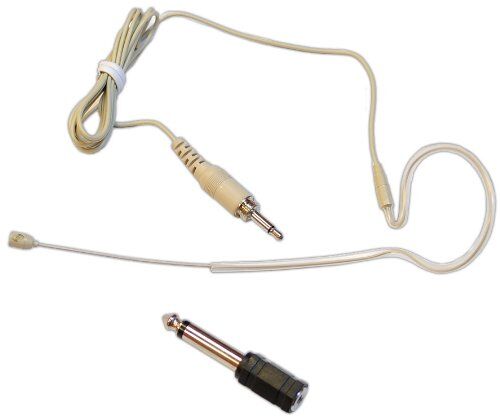
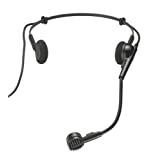
Head-worn mics sound much better than built-in computer mics and aren't as noise prone as a lavalier.

Head-worn mics sound much better than built-in computer mics and aren’t as noise prone as a lavalier.

likely pick up a great deal of background noise including the sound of your voice echoing off your walls. An inexpensive lavalier (Lapel clip style) mic can be plugged directly into the mic input of your computer. USB podcast mics can be reasonably priced if you don’t need portability. Head-worn mics are super the best of both worlds and unlike the lavalier, they won’t pick up the sound of your clothing as you move about.

When possible, use ear-buds instead of computer speakers. The sound from your speakers will be picked up by your mic and can lead to echos , feedback, or muddiness in your audio. Cheap ones can be purchased at the dollar stores but they’re not so good on your ear health. Be good to your hearing and invest in the best you can afford.

You can also get a head-set that has both head-phones and a boom mic. These are available from bulky down to slim and lightweight. Go light-weight if you’re not into that 80’s air-traffic-controller look.

A combo headset like this is portable, sounds great and can eliminate back-gound noise and echos

A combo headset like this is portable, sounds great and can eliminate back-gound noise and echos


Heloooo? Is anybody there? It’s important to use sufficient lighting.

CFL’s run cooler than halogen and incandescent.In low-light conditions, your camera has to amplify the signal it sees and this results in noise that looks like graininess, ugly color and lack of sharp focus. This get’s worse with lesser quality webcams. The light coming from your monitor should not be considered sufficient.  A minimum of two 60-watt equivalent lamps within 6 feet of your face is a good starting point. A couple of cheap Harbor Freight or hardware-store clamp-on work-lights – one pointed directly at you and one bouncing light off the ceiling can create a soft and pleasing look. Use compact fluorescent bulbs since they run cool and won’t heat up your office.

Avoid back-lighting else you look like a talking silhouette with glowing edges. This type of lighting can also create havoc with the auto-exposure systems in your camera that can result in a visual pulsing that will serve quite well to annoy your viewers.

Inexpensive and available from tool and hardware stores. The larger the reflector, the softer the light. Get better light by using two or more.

The bigger the reflector the softer the light. A 10.5″ dish is better than a 6″ dish. You can also paint the interior white to soften the light a bit more. This will help reduce pore detail and the visibility of wrinkles too! Not that any of us are actually concerned about such things…


Yeah okay but those work-lights look terrible in my carefully designed office. What then?
Ikea has some great looking work lights in both clamp, table and floor options.

Certainly a step-up from the look of a shop light. Would also make a great background light.


Nicely styled clamp light. Moves easy and clamps about anywhere. Larger reflector provides a decent light. Point one at you and bounce the light of the other off an opposite wall for great looking light.


Part of the same Ranarp series, this could easily be combined with a couple of clamp-ons to create some fantastic light for your video sessions.


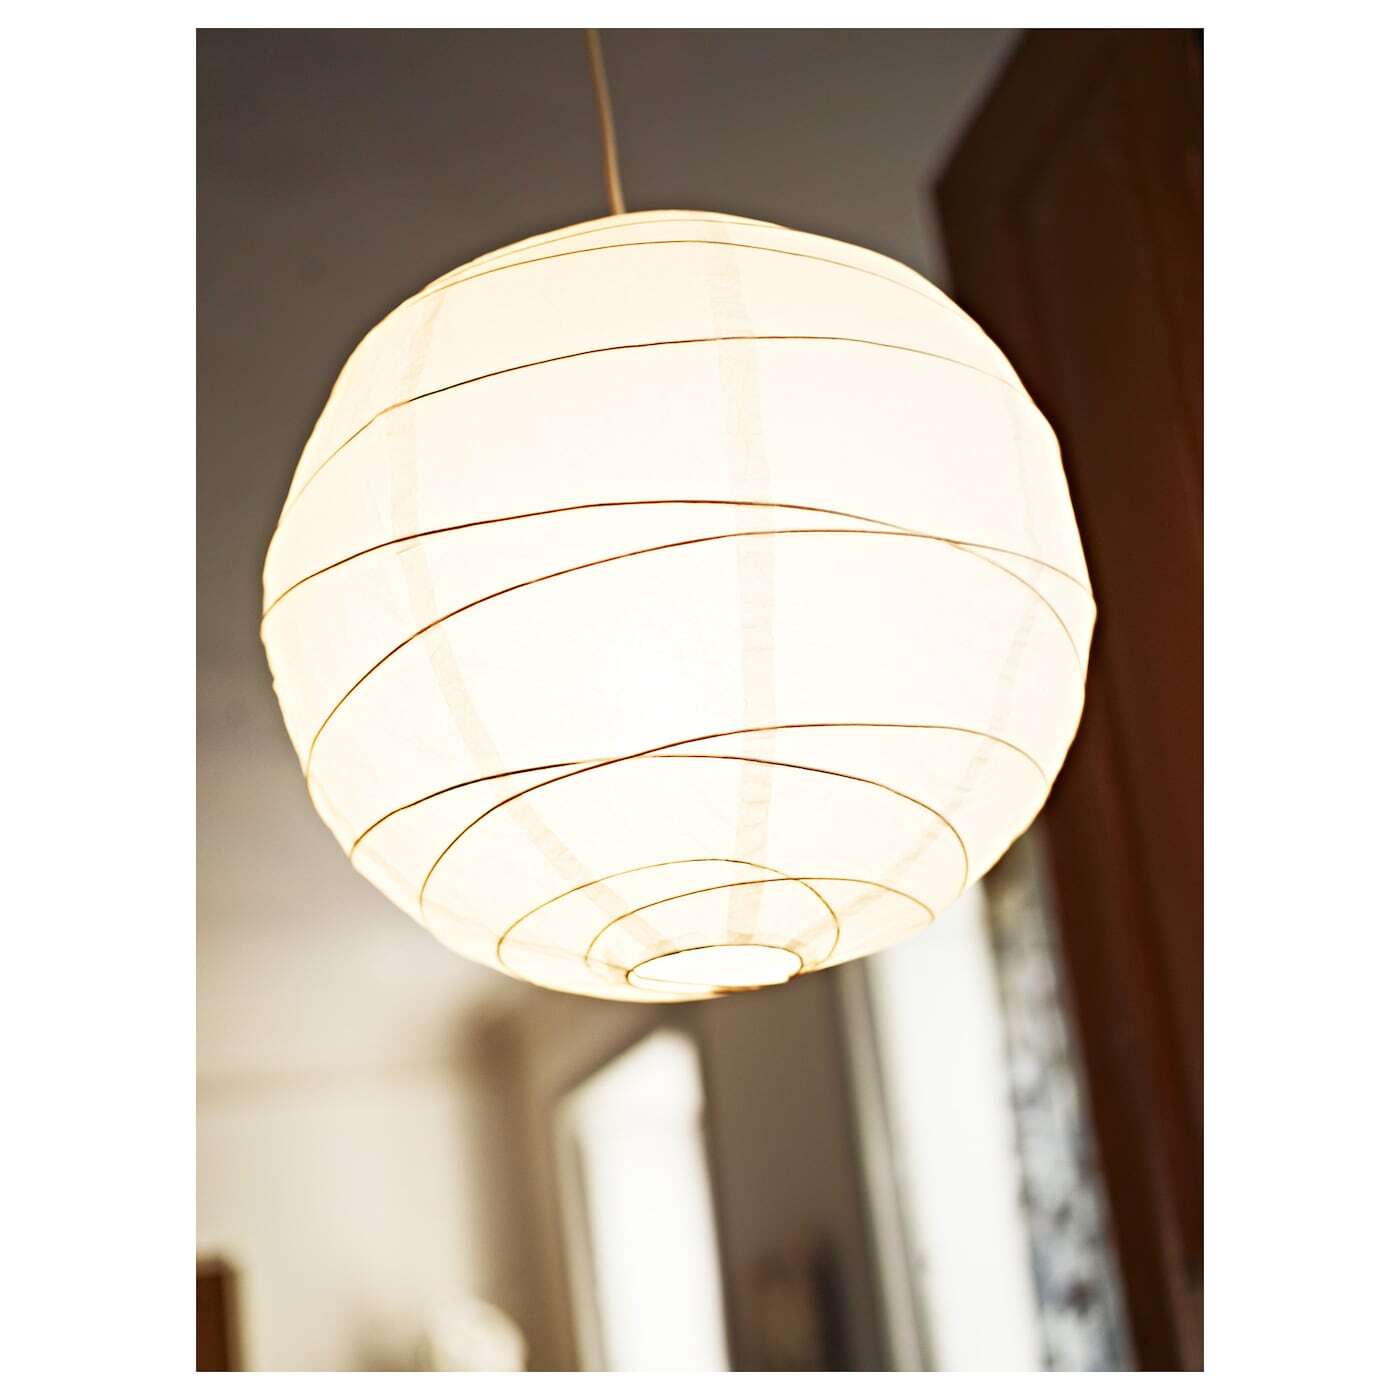
China Ball style lantern from Ikea for wrap-around soft light

China Ball style lantern from Ikea for wrap-around soft light

In the professional video world there exists a type of light called the “China Ball”. Inspired by the round paper lanterns of China, these cast a omni-directional light that is super soft, very flattering and somewhat mimic the look of a professional soft-box except they throw the light everywhere – not in just one direction. The lighting is not inspiring from an artistic cinemagraphic point of view, but the lights look nice in the home or office. The lanterns are intended to be hung from the ceiling pendant-style and can be found at Ikea and import stores for around $5. https://www.ikea.com/us/en/catalog/products/70103410/ These are just the lanterns. You will also need a light kit that includes socket, cord and built-in switch. https://www.ikea.com/us/en/catalog/products/70103410/

Ikea has many stylish lighting options that mimic the china ball for under $20
Floor: https://www.ikea.com/us/en/catalog/categories/departments/living_room/10731/?priceFilter=true&minprice=7&maxprice=20
This model allows for both bounce and direct lighting in one. It is a torchiere with a side light mounted on a gooseneck that can be pointed where you like.
Table:
https://www.ikea.com/us/en/catalog/products/70096377/
and
https://www.ikea.com/us/en/catalog/products/40172462/


Quality video streaming also requires a good network, fast internet and a computer that isn’t running at a crawl. For more tips on improving your video chats, check out the post: Improving Your Google Hangout Experience.

Do you have some tips you would like to share? You can show your stuff and help others by adding your ideas to the comment stream below.
Improving your Google Hangout Experience.

GoogleHOABadgeThe rising star in online networking is the Google Plus Hangout On Air, or HOA for short. This medium mixes the experiences of video conferenceing, webinars, screen sharing and chat all in one easy-to-use package. The affordable (can you say free?) tool also comes with the added benefit of increasing your SEO, your personal brand and the leverage of your YouTube channel.

If you are not using HOAs now, I urge you to look into them. Here are a couple of resources I highly recommend to get you on the right track towards understanding the benefits.

Entrepreneur and Social Media coach; Sandra Watson over at EasyFYINow.com provides valuable direction for those new to any social media platform.

Carol Dodsley has a G+ mastery course for those who want to dig deeper into the G+ community. She also hosts several weekly shows on G+ that cover a range of topics. You can find one of Carol’s posts espousing the virtues of G+ HOAs here. 

NewRay.com has a great post that makes a great business case for the use of HOAs

Regardless of the platform, a good video conferencing experience requires some attention to detail to avoid bugs and other road-blocks. 

Having troubles with your video dropping out during an HOA?  Not getting clear video into your stream? Here’s a few things to do before you start your broadcast:

Attach to your network via Ethernet cable and turn off wireless at your computer.  Unless you are running the new experimental gigabit wireless, your Ethernet is likely to be much faster and less problematic.

Turn off all devices on your network that do not need to remain on during the broadcast.  When devices are on , they are routinely sending various signals across the network, potentially creating congestion. This network traffic then get’s “heard” by your computer causing it to take processing cycles to evaluate the traffic and determine if it is something it needs to pay attention to. Quieting things down on your network will help your computer focus it’s attention on your feed.

Speaking of quieting… Network and modem cables should never be running parallel and close to a power cord.  Power cords emit a small amount of radio frequency interference (RFI) that is picked up by your network cables. This causes glitches that will effect data transfer rates ( slows your network down). It’s nearly impossible to route these completely separated as often they at least need to cross over each other to get to where they need to go – in this case, do your best to cross them perpendicular so they look like a plus (+) sign.

Same goes for USB and Microphone cables too. Keep them away from power cords when possible for all the same reasons.

Use the chrome browser when possible. It’s developed by Google and will likely be the most stable for the hangout plugin.

Speaking of plugins, they suck.  Memory and resources I mean. 🙂 They consume ram, processor resources and are constantly pinging the network.  Turn off any plugins, search bars,  and extensions you don’t need for the broadcast.

Close any browser tabs you don’t need open. One tab can consume between 50 and 300MB of addition memory, depending on what is loaded into that tab. Also, tabs that are open could be sending traffic across your network. Shhhhh…. a quiet network is a happy and speedy network.

Turn off ALL other applications – including browsers – you don’t need during the broadcast. Not only are they slowing down your computer, they are likely using your network. Email apps are always looking for new email. You don’t want to be downloading 25MB of attachments while you are trying to stream 3MB per second of HOA video.

If you are running windows, you can temporarily turn of automatic updates to prevent activity during your HOA. Just remember to turn it back on later.

Run a valid copy of a good anti-virus and anti-malware application and keep it current and up to date. An infected machine = a slow machine.

If all of this is not enough to get things looking good then:

In dire conditions where you have done all of the above and are still having video drop-outs, uninstall any applications that you don’t use on your computer. Many of these applications monitor your network to talk to the devices you just shut off. Printer utilities are a big resource sucker and can often be uninstalled. Do you really need some bit of software to nag you when you are low on paper or ink?  Some of your installed applications will also check the internet every few minutes to see if there are updates available that need to be installed – thus slowing your network.

On windows machines: turn off file indexing. This “feature” does make it faster to find files on your machine, but it is also doing a great deal of disk reads and writes, perhaps during your broadcast.

Whew! Sounds like a lot to do, but it’s not really all that much.  Once you have cleaned your machine of any malware and removed old applications you don’t need, and moved your cables the tedious work is done.  When you are ready to do an HOA the easy thing is to reboot. This will close any applications you have running. When the computer comes back up and you login, open just Chrome, launch one tab to G+ and you should be on your way to a great HOA experience!

Don’t discount the benefits of a good mic, and adequate lighting. For more on that, have a look at the post: Easy and Inexpensive Tips for Better Video Meetings

Looking for more LEADS through Social Media? This is a great place to start!

For my very first Google+ hangout I spoke on the panel as a Social Media expert for an HOA (Hangeout on Air) for SMGDenver and I had a blast! Lots of great information was shared. If you are looking to generate leads through social media, or looking to create an online business community with your existing social media platforms, this video is a great place to start.


Happy to answer any questions, so feel free to leave them in the comment section below.

Beautify Your Photographs While Making a Great First Impression

We were recently introduced to a new type of laminate for photographs, ink jet and poster prints we call “Crystal” for its faceted like surface. This is very different than a normal gloss or lustre coating. Being 5 ML thick with full UV protection, this laminate is extremely durable. We put it to the test for over 2 months and found it to be one of the toughest cold mount poly laminates we have seen. Our test clients loved it immediately and all but demanded we add it to our lineup of products. No doubt about it, the blacks are much richer, colors have more pop and the image has more depth and clarity. We first started offering this product strictly on our Gallery Mounts because it is tough enough to go through our edging machine and not show any scuffs or damage.

Now, we have make it available for any print mounted to any type of substrate. Fine art prints from wildlife and scenic’s to abstracts and commercial prints never looked richer or have had better protection. Check out our samples at the lab or if you are out of town just call us to have one sent out to you. My personal recommendation for an incredible eye catching, heart stopping, WOW kind of print is to put this laminate on Kodak Metallic paper. Although it also looks great on Fuji Crystal Archive C print paper and Fuji Flex, the Metallic is killer.

How to Get Great Color, Save Profits, and Never Have to Work Color or Density in Photoshop or Lightroom. Part 1

I’m going to fill you in on the secrets of how to get great color, save your
profits, and never have to work color or density in Photoshop. All without
the use of ICC profiles, confusing work-flows or batch conversions.
If you understood the above and it applies to you, chances are you are a
professional photographer. Professional print quality is much easier to achieve
than most photographers are aware.

Getting there requires Five crucial elements. With these five in place, you can go
directly from camera to print and get excellent results.

Yes, that’s right, higher profits and more free time with:
No Photoshop work.
No profiling magic.
No bag of tricks or fairy dust.

Rule #1 – If you have to adjust the density of your files, your metering is inaccurate.
You may find this hard to believe, but truly consistent spot-on exposures rarely come
from TTL metering. I know that’s tough to swallow, but reflective metering is just too fallible.

Don’t believe me? Here is a simple test to see if this rule applies to you.
1. Take a look at the average corrections you are making on your files in
Photoshop or Lightroom.
2. Jot down the number of exposure corrections you make in a work week.
3. If the answer is any higher than zero, guess what, I’m right – your TTL has failed you. So how do we correct this?
Get a GOOD new or used hand held incident flash meter, and calibrate it to your
camera using Will Crockett’s “Face mask Histogram Technique” copy and paste
the following web address into your browser: Go to
http://www.shootsmarter.com/index.php?option=com_content&task=view&id=116&acat=16
Keep in mind that digital cameras have only 1/8th stop of exposure latitude. If you
have an incident meter, compare it against Will’s meter reviews and see how it rates. Some
well known meters are unprofessionally inconsistent . Up to a horrible deviation of +- 1/3 stop from reading to reading. This is definitely outside of the acceptable range for a professional photographer and enough to put you back in an editing app to tweak density.

After you have calibrated your meter to your camera using the Face Mask Histogram, you have completed the first of a few simple steps towards a more efficient and predictable workflow. Take some test shots this week and fine tune your exposure calibrations to ensure you are keeping your highlight detail while maintaining good shadow detail.
Next time:
Part 2.

How to get Great Color, Save Your Profits, and Never Have to Work Color or Density in Photoshop. Part 2

My last blog post discussed the weakness of TTL metering and the need for spot on exposure to avoid working your files in photoshop. Thus saving money and time which should result in a more profitable business.

Rule #2 – If you don’t have proper white balance, you don’t have correct color.
This seems like a real “DUH!” statement, but it is astonishing how many pro’s still don’t grasp the importance of this.
Using auto white balance in a high-end professional workflow is a bad idea? Auto WB works if you have absolute
neutrals in your image, and even then it can be fooled by bright or near neutral tones in your subjects. If you are not getting consistent skin tones from sitting to sitting, or indoor to outdoor it’s time to adopt custom WB in your capture work-flow. And you wouldn’t dream of passing these auto white balance inconsistencies on to your final client prints – right?
The brief amount of time it takes to get an accurate custom white balance by using an accurate target can, and likely will, save your studio hours of Photoshop time.
And I am sure you know that in a pro studio:
Hours = (Profit – Dollars + extra time you could be getting more business).
And if you are paying staff to deal with exposure and white balance issues, don’t forget to add in payroll taxes and benefits to that equation. With accurate white balance control, you will NOT need to adjust the color of your files. Assuming of course that your camera is in a good state of repair. It is rare that the preset white balances on your camera will be accurate enough for professional standards.

To get an accurate WB, you need an accurate target.
If you are using a Kodak Grey card or one of those black/white/gray targets or a plastic over-the-lens diffuser, I would invite you to upgrade to something more accurate. If quality and/or profit margin are your #1 concerns; above all else get the most accurate WB target available. The Balance Smarter from the smart folks at BalanceSmarter.com.
Your color is only as good as the WB target you use. If you skimp here, you’ll pay the price later in additional work or reprints. Is it worth the risk?. After spending thousands on education, good gear and marketing to get business, seems a shame to put the investment and your reputation all on the line using a cheapo calibration target or tool.

If you are still tempted to take shortcuts during the shoot, every time you have the thought ” I’ll just fix it in Photoshop later”, say to yourself instead:
” I’ll just spend the time and money to fix it in Photoshop later”
Be Honest, isn’t the latter REALLY what you would be doing?

Next week:
Rule #3 – Using the right colorspace = great prints!

6 Easy Tips to Avoid Trouble With Your E-Letter

When Reed Art & Imaging decided to publish an electronic newsletter. I went on an expedition to investigate what was the best software to use and how to comply with the anti-spam laws. Initially I tried two programs; Constant Contact and Autoresponder. Constant Contact has templates that were fairly easy to edit and use. I initiated a trial with Constant Contact for 60 days. During that time, I worked with their templates and basically had a test drive. I found Constant Contact, fairly easy to use. Autoresponder allowed me to cut and paste the code in from Adobe Dreamweaver. I used Adobe’s Dreamweaver to design and create the HTML e-letter. We used Autoresponder to send out the e-letter. We currently use A Better Email which has some great features. All of these programs helped you to comply with the CAN_SPAM act. These federal laws, must be followed or you can be heavily fined. Here’s the website address to download a pdf file of these requirements from the Federal Trade Commission.:

http://business.ftc.gov/documents/bus61-can-spam-act-Compliance-Guide-for-Business

Below is a rundown of CAN-SPAM’s main requirements:

Don’t use false or misleading header information.
Your “From,” “To,” “Reply-To,” and routing information – including the originating domain name and email address – must be accurate and identify the person or business who initiated the message.

1) Don’t use deceptive subject lines.
The subject line must accurately reflect the content of the message.
Identify the message as an ad. The law gives you a lot of leeway in how to do this, but you must disclose clearly and conspicuously that your message is an advertisement.
Tell recipients where you’re located. Your message must include your valid physical postal address. This can be your current street address, a post office box you’ve registered with the U.S. Postal Service, or a private mailbox you’ve registered with a commercial mail receiving agency established under Postal Service regulations.

2) Tell recipients how to opt out of receiving future email from you.
Your message must include a clear and conspicuous explanation of how the recipient can opt out of getting email from you in the future. Craft the notice in a way that’s easy for an ordinary person to recognize, read, and understand. Creative use of type size, color, and location can improve clarity. Give a return email address or another easy Internet-based way to allow people to communicate their choice to you. You may create a menu to allow a recipient to opt out of certain types of messages, but you must include the option to stop all commercial messages from you. Make sure your spam filter doesn’t block these opt-out requests.

3) Honor opt-out requests promptly.
Any opt-out mechanism you offer must be able to process opt-out requests for at least 30 days after you send your message. You must honor a recipient’s opt-out request within 10 business days. You can’t charge a fee, require the recipient to give you any personally identifying information beyond an email address, or make the recipient take any step other than sending a reply email or visiting a single page on an Internet website as a condition for honoring an opt-out request. Once people have told you they don’t want to receive more messages from you, you can’t sell or transfer their email addresses, even in the form of a mailing list. The only exception is that you may transfer the addresses to a company you’ve hired to help you comply with the CAN-SPAM Act.

4) Monitor what others are doing on your behalf.
The law makes clear that even if you hire another company to handle your email marketing, you can’t contract away your legal responsibility to comply with the law. Both the company whose product is promoted in the message and the company that actually sends the message may be held legally responsible.

5) Do not ‘buy’ a list.
The best results always come from people who opt in and that know or know of you. Also, Constant Contact does not allow you to use purchased lists. We work within our own customer base or use an opt-in to receive the e-letter. We include an unsubscribe feature and honor any request we receive to opt-out from receiving the e-letter.

5) Make Your E-Letter Unique!
Our e-letter has monthly contests that I find. We hold frequent contests for our Facebook fans too! Every week the theme changes and around once a month we hold a contest and the winner is chosen by the amount of likes that their image receives. Whenever we find something that promotes a community group, we try and let our readers know about it. Additionally we promote through a short video, selected customers. Each video has an interview and a slide show of the customers work. One of our core beliefs, is that when our customers win, we win.

How to Get Great Color, Save Your Profits, and Never Have to Work Color or Density in Photoshop. Part 3

My last two blog posts discussed the critical need for spot-on metering and absolute correct white balance to avoid working your files in photoshop. Thus saving money and time which should result in better prints and a more profitable business.

Rule #3 – correct working space + Printer space = Great Print!
Digital cameras work extremely well in the sRGB space, and coincidentally, the Fuji Frontier/Noritsu printers of the world are designed to work within that space. Hmmmm, wonder why that would be….

Straight up – an sRGB work flow is your direct channel to go from camera to print. Shooting in Adobe1998 will not gain you any tonal range in the file. Both color spaces have the same levels per channel limit. And this is based on your camera’s bit depth, not your choice of working color space. Neither will any get whiter than 255, 255, 255 and neither will get any darker than 0,0,0.
You have black to white and the same number of levels in both. The gains are in the number of available colors. The larger the space the more colors. Typically these relate to high saturation colors that don’t often show up in most scenes.

These benefits of specific color spaces come into play on the output. Shooting in a color space that does not approximate that of your output device can lead to unpredictable color unless you are willing to spend the time converting to the output profile via a color managed workflow. That step can be sped up using batch processing, Remember, the goal here is to reduce your work load and still get a great print –  right?  Supplying a file to your printer in a mis-matched color space can result in saturation, contrast and color issues that will require intervention to get a good print. Again; Intervention = additional cost.

If you are shooting portraits and weddings, the largest percentage of your work prints 12×18 or smaller right? This means they go to our Fuji Frontier for printing on professional paper.
When  your work is more along the lines of fine-art, we strongly recommend a properly color managed work-flow that includes the use of output profiles. Your takeaway: Shoot in sRGB when printing to sRGB type devices. When printing to higher gamut devices, or when in doubt, shoot Adobe 1998 and convert to the output profiles.

Using the steps described in this series so far, you are well on your way to a slimmer, faster and more profitable work-flow. Barring any need for retouching, you should be able to go straight from camera to output and get a fantastic print.  Give it a try and let us know how it worked out for you.

Next week: Part 4. Picking the file format.

How to Get Great Color, Save Your Profits, and Never Have to Work Color or Density in Photoshop. Part 4

In the previous post in this series, I wrote about using sRGB for printing your studio work.
This post we talk about how JPEG can be your workflow friend.

Rule #4 – JPEG has benefits.
Shooting raw has its place. Like when the dynamic range of the scene far exceeds that of your camera. Or when you need to really fine-tune an image. But-if you are shooting raw because you aren’t getting good results in-camera with jpeg, please re-visit rules 1, 2, and 3. If you get the first three crucial elements in place, you won’t need raw for your portrait and senior work. Shooting in JPEG eliminates the steps required to convert from camera raw. If your image sensors are clean, and you have all the other elements in place you can send your files direct for printing/proofing without any further work, barring retouch or enhancements of course. This process may not be ideal for fine-art or landscape shooters, but it can be ideal for portrait and wedding shooters.

If you choose to shoot JPEG files, set your camera for maximum size files and the largest pixel dimensions. And be careful with just how much sharpening you allow the camera to apply. Too much sharpening and you might get too much pore detail on the closeups. Too little and the image will of course look soft. Excessive sharpening also limits just how large you can print the file before the sharpening artifacts become painfully obvious. Spend a little time testing now, and you’ll have the confidence to know later that your files will look great right out of the camera.

Rule #5 – Print on quality photographic paper.
This means professional paper. Not the over contrasty, over saturated non-neutral stuff you get from drug stores, discount marts, warehouse/membership stores. This means use a good pro lab. Not Costco, not Wal Mart, not Walgreens, not Drug Emporium, etc etc etc.

The papers you get from consumer mini-labs are purposely manufactured to NOT have accurate color. Yep, they make it screwy on purpose. You see, Joe Consumer likes prints with colors that aren’t real. They want false saturation and contrast for that extra snap. In most cases, their photos benefit from that assistance to help the snap-shot look a bit more appealing to the eye.

Professional paper is manufactured to very exacting standards to achieve neutral balance, correct saturation and excellent skin tones. Pro papers will handle extra saturation if you really need it for your “look”, so add it if you wish, but at least you have the option. And get this, just by using pro papers, you get an additional stop of shadow detail! That’s right, you get deeper blacks with pro papers. This means you can actually get a snappier looking print and hold shadow detail when your files are setup correctly.  A properly exposed, correctly white balanced image with great composition that is printed on professional photographic paper won’t need the artificial extra punch to compensate.


So there you have it, the keys to establishing a profitable and expedient workflow.

  1. For spot-on exposure and excellent detail use a professional incident meter, not TTL
  2. Perfect color comes from accurate white balance using a high-end accurate digital-ready target
  3. Using a colorspace that most closely matches your output device will speed up workflow and minimize color shifts
  4. For the studio, JPEG files will expedite your production and get you to print faster
  5. The most accurate color and deepest tonal ranges come from printing on professional papers.

We would love to hear how this all works out for you. Do you have other workflow tips you would like to share? Post them in the comments section.

Making YouTube Videos: Staying Organized and Spending Less Time Doing It.

The creative person inside of me always wants to go with the flow, let my creative juices just start to simmer and pretty soon I’ll have created something great. Well as much as I wish that’s the way it worked for my videos, it doesn’t. The devil is in the details. I have to think two steps ahead before I move one step forward.

We love making YouTube videos but we also stream them each month via our e-letter, website and Facebook page. That doesn’t sound like too much effort, right? Here are the steps I go through in the process of creating a YouTube video about 2-3 minutes long.

First of all, you have to find the talent (that’s the subject of your video). I look for someone that seems like they would be reasonably comfortable talking about their work. Genuine enthusiasm is contagious. The viewer knows when someone loves what they do. Whether you are videotaping an artist or a CEO of a company, you want your “talent” to love their chosen profession. Now that I have chosen my subject, I must get them onboard with the project. I contact them to schedule an initial appointment to discuss their art, what the video will be about and how we will use it. Take the time to get to know a bit about what it is they do. Since I video fine artists and photographers, I look at their art as some of it will be incorporated into the video. Approach them with the idea that this video is good exposure for them. As a safety net for them, give them the opportunity to view the video prior to posting it on YouTube. As a marketing tool, engaging videos are great. Potential consumers love videos!

It’s time for the first meeting. Getting a signed release is a good idea, and the first meeting is as good a time as any to get one. Make sure to agree on a schedule for the video shoot before you leave the meeting. Let the subject know to plan on a 1 to 1.5 hour slot for the actual shoot. Your subject is most likely excited about the project and getting the date of the shoot out of the way means you save time with back and forth phone calls or e-mails. That part is now done and you can move on to planning the shoot! Most of our videos have the element of a slide show edited into them. Generally that’s about 10-15 images one to one-and-a-half minutes per 2-3 minute video. During the initial meeting, ask them to supply digital images of their art or products (whatever it is that drives your subject). You can pick those up from them at the shoot. Adding additional content adds interest for the potential viewer and builds up the posture of the subject. The more your viewer is engaged, the more attention will be paid to your video, and the more professional you subject comes across, the more authority your video has as a marketing tool. You want the viewers to tell their friends, and engaging and informative can go a long way to get your video some exposure.

So far you have invested 1-2 hours in planning and meeting with your next potential star. Not too bad. Now it’s time to get behind the camera and shoot the video. Plan on shooting 7-15 minutes of raw video for 2 minutes of finished product. It could take you an hour or so to get this much material. Out-takes and other unexpected issues will eat a fair amount of extra time. Out of that raw video you will either edit out your 2 minutes max or you’ll have enough for a series of videos that you can use down the road. Double or triple your time based on how long the final video should be. There is setup, sound testing (it’s a good idea to do a short recording to ensure everything is hooked up correctly and your settings are correct, prior to shooting the real footage), and in general making the talent feel comfortable. Most of us are not professional actors and as such, feel a little nervous with a camera staring us down, recording our every nuance. I don’t “interview” my subjects. I just want them to talk about their art, what drives them, how they got started and just generally how they feel when they are creating. I want to deliver the emotion of the artist. Expressing how we feel about something drives us to fully engage.

Now it’s time to edit your video down to a manageable size. This can take no time at all or go on for hours. It really depends on the quality of the raw video and how you intend to express your message. The first thing I do is watch the entire un-editied raw video. I am looking for the subject to be relaxed and comfortable. If your subject really doesn’t make it to the point of being visually relaxed, it’s ok. You can strip out the audio and lay the sound track over the slide show for the video portion. If the slide show is at the end of the video, I add a music track to go along with the images. It really depends on the type of art or subject matter, as to the type of music I add. I ask the subject during the initial meeting, what kind of music they like. I create my tracks in Apple’s Garage Band, which is copyright free. If you use music that is owned by someone, you run the risk of being sued. You either create your own tracks, using something like Garage Band, purchase copyright free music or pay a royalty to the owner plus get permission. Most music tracks that have copyright, have a per use fee associated with them. That means every time it plays, there is a royalty that needs to be paid. So if your video goes viral, you could be in for a hefty bill. We’ll talk about how to create music in Garage Band in another blog. Once I have the video edited the way I want it, I export it to a Quicktime movie. I optimize the movie for viewing on YouTube. You can make it HD or save at a higher viewing resolution if you like. YouTube will handle up to 15 minutes of video with a size restraint up to 2 GB of data. Whew…that’s some heavy lifting! Once the video has posted to YouTube, we send our subject the link where the video can be found on our website and encourage them to post the link on their own websites, link to YouTube video directly or post YouTube video itself on their sites. Internet search engines like inbound links to your sites and videos are a great way to encourage those links. It’s a win-win way to promote your client, your art, yourself or your products.

Next time: Making videos ahead of schedule
Feel free to leave a comment and I’ll get in touch.