Professional Drum Scanning – What You Need to Know to Be the Smartest Person In The Room

Drum Scans

Color space is determined by the methodology used to create the colors within a file. The most popular of those are:
RGB
CMYK
LAB or a similar space such as YCC
RGB is gaining popularity in the graphics output community. RGB colors are “mixed” using values stated in levels instead of percentages. i.e. 0 to 255 rather than 0% to 100 %. This colorspace can be thought of as a “Transmissive” colorspace as RGB devices use light to image instead of pigments. As your levels increase towards 255, your values get lighter.
Black, medium grey and white in RGB are created from the following mi

Black Medium Grey White
RGB RGB RGB
0 0 0 127 127 127 255 255 255

As you can see, the closer to white (more light) the higher the number.

RGB is a “Device Independent” colorspace, meaning that regardless of the device printed to, a given color in a file will always be made of the same color “mix.”

CMYK is a long standing “standard” but is not a device independent colorspace. This is due to the many variables in the CMYK world. GCR (Grey Component Removal) and UCR (Under Color Removal) can result in the same perceived color being reproduced with several different combinations of Cyan Magenta and Yellow, depending on the level of the Black. These mixes are determined by paper stock, press conditions, inks used, etc. One CMYK file built for a web press, can yield drastically different results when sent to a sheet-fed press, or an inkjet printer. Each of these devices prefers different levels of GCR, or UCR. Creating a CMYK file for one, does not mean it will perform as expected on the other. Because CMYK files are “calibrated” to a specific device, they are referred to as “Device Dependent”. CMYK values are measured in percentages from 0% to 100%. The higher the number, the more ink is laid on the paper during printing. Because each press and paper combination can yield different results, there is no exact formula for a rich black, middle grey, or any other color except for “paper white” which is:

White
C M Y K
0% 0% 0% 0%

There are several formulas that are used throughout the industry as approximate guidelines. These can be obtained from your printer.

Our Professional Drum Scanning is provided in a RGB colorspace file unless otherwise requested. All scanners actually see in RGB, but a CMYK scan is converted on the fly through either hardware or software algorithms. By providing you with an RGB scan, we are allowing you or your service provider to convert the file to CMYK based on their individual requirements, leading to a higher quality product

.

Wholesale Photo-Plaque Opportunities Available

If you have a retail or online business and are looking for a fast selling, highly profitable product, look no further!

Wholesale Photo-Plaques

sfyl logoASignOfWisdom.com has dedicated itself to selling our entire line of photo-plaques!
Choose from Travel, Inspirational, Humorous and Vintage.
To see our entire line, visit  www.asignofwisdom.com. Our line of products is a proven money maker in online storefronts such as amazon or ebay.

6 Easy Tips to Avoid Trouble With Your E-Letter

When Reed Art & Imaging decided to publish an electronic newsletter. I went on an expedition to investigate what was the best software to use and how to comply with the anti-spam laws. Initially I tried two programs; Constant Contact and Autoresponder. Constant Contact has templates that were fairly easy to edit and use. I initiated a trial with Constant Contact for 60 days. During that time, I worked with their templates and basically had a test drive. I found Constant Contact, fairly easy to use. Autoresponder allowed me to cut and paste the code in from Adobe Dreamweaver. I used Adobe’s Dreamweaver to design and create the HTML e-letter. We used Autoresponder to send out the e-letter. We currently use A Better Email which has some great features. All of these programs helped you to comply with the CAN_SPAM act. These federal laws, must be followed or you can be heavily fined. Here’s the website address to download a pdf file of these requirements from the Federal Trade Commission.:

http://business.ftc.gov/documents/bus61-can-spam-act-Compliance-Guide-for-Business

Below is a rundown of CAN-SPAM’s main requirements:

Don’t use false or misleading header information.
Your “From,” “To,” “Reply-To,” and routing information – including the originating domain name and email address – must be accurate and identify the person or business who initiated the message.

1) Don’t use deceptive subject lines.
The subject line must accurately reflect the content of the message.
Identify the message as an ad. The law gives you a lot of leeway in how to do this, but you must disclose clearly and conspicuously that your message is an advertisement.
Tell recipients where you’re located. Your message must include your valid physical postal address. This can be your current street address, a post office box you’ve registered with the U.S. Postal Service, or a private mailbox you’ve registered with a commercial mail receiving agency established under Postal Service regulations.

2) Tell recipients how to opt out of receiving future email from you.
Your message must include a clear and conspicuous explanation of how the recipient can opt out of getting email from you in the future. Craft the notice in a way that’s easy for an ordinary person to recognize, read, and understand. Creative use of type size, color, and location can improve clarity. Give a return email address or another easy Internet-based way to allow people to communicate their choice to you. You may create a menu to allow a recipient to opt out of certain types of messages, but you must include the option to stop all commercial messages from you. Make sure your spam filter doesn’t block these opt-out requests.

3) Honor opt-out requests promptly.
Any opt-out mechanism you offer must be able to process opt-out requests for at least 30 days after you send your message. You must honor a recipient’s opt-out request within 10 business days. You can’t charge a fee, require the recipient to give you any personally identifying information beyond an email address, or make the recipient take any step other than sending a reply email or visiting a single page on an Internet website as a condition for honoring an opt-out request. Once people have told you they don’t want to receive more messages from you, you can’t sell or transfer their email addresses, even in the form of a mailing list. The only exception is that you may transfer the addresses to a company you’ve hired to help you comply with the CAN-SPAM Act.

4) Monitor what others are doing on your behalf.
The law makes clear that even if you hire another company to handle your email marketing, you can’t contract away your legal responsibility to comply with the law. Both the company whose product is promoted in the message and the company that actually sends the message may be held legally responsible.

5) Do not ‘buy’ a list.
The best results always come from people who opt in and that know or know of you. Also, Constant Contact does not allow you to use purchased lists. We work within our own customer base or use an opt-in to receive the e-letter. We include an unsubscribe feature and honor any request we receive to opt-out from receiving the e-letter.

5) Make Your E-Letter Unique!
Our e-letter has monthly contests that I find. We hold frequent contests for our Facebook fans too! Every week the theme changes and around once a month we hold a contest and the winner is chosen by the amount of likes that their image receives. Whenever we find something that promotes a community group, we try and let our readers know about it. Additionally we promote through a short video, selected customers. Each video has an interview and a slide show of the customers work. One of our core beliefs, is that when our customers win, we win.

Making YouTube Videos: Staying Organized and Spending Less Time Doing It.

The creative person inside of me always wants to go with the flow, let my creative juices just start to simmer and pretty soon I’ll have created something great. Well as much as I wish that’s the way it worked for my videos, it doesn’t. The devil is in the details. I have to think two steps ahead before I move one step forward.

We love making YouTube videos but we also stream them each month via our e-letter, website and Facebook page. That doesn’t sound like too much effort, right? Here are the steps I go through in the process of creating a YouTube video about 2-3 minutes long.

First of all, you have to find the talent (that’s the subject of your video). I look for someone that seems like they would be reasonably comfortable talking about their work. Genuine enthusiasm is contagious. The viewer knows when someone loves what they do. Whether you are videotaping an artist or a CEO of a company, you want your “talent” to love their chosen profession. Now that I have chosen my subject, I must get them onboard with the project. I contact them to schedule an initial appointment to discuss their art, what the video will be about and how we will use it. Take the time to get to know a bit about what it is they do. Since I video fine artists and photographers, I look at their art as some of it will be incorporated into the video. Approach them with the idea that this video is good exposure for them. As a safety net for them, give them the opportunity to view the video prior to posting it on YouTube. As a marketing tool, engaging videos are great. Potential consumers love videos!

It’s time for the first meeting. Getting a signed release is a good idea, and the first meeting is as good a time as any to get one. Make sure to agree on a schedule for the video shoot before you leave the meeting. Let the subject know to plan on a 1 to 1.5 hour slot for the actual shoot. Your subject is most likely excited about the project and getting the date of the shoot out of the way means you save time with back and forth phone calls or e-mails. That part is now done and you can move on to planning the shoot! Most of our videos have the element of a slide show edited into them. Generally that’s about 10-15 images one to one-and-a-half minutes per 2-3 minute video. During the initial meeting, ask them to supply digital images of their art or products (whatever it is that drives your subject). You can pick those up from them at the shoot. Adding additional content adds interest for the potential viewer and builds up the posture of the subject. The more your viewer is engaged, the more attention will be paid to your video, and the more professional you subject comes across, the more authority your video has as a marketing tool. You want the viewers to tell their friends, and engaging and informative can go a long way to get your video some exposure.

So far you have invested 1-2 hours in planning and meeting with your next potential star. Not too bad. Now it’s time to get behind the camera and shoot the video. Plan on shooting 7-15 minutes of raw video for 2 minutes of finished product. It could take you an hour or so to get this much material. Out-takes and other unexpected issues will eat a fair amount of extra time. Out of that raw video you will either edit out your 2 minutes max or you’ll have enough for a series of videos that you can use down the road. Double or triple your time based on how long the final video should be. There is setup, sound testing (it’s a good idea to do a short recording to ensure everything is hooked up correctly and your settings are correct, prior to shooting the real footage), and in general making the talent feel comfortable. Most of us are not professional actors and as such, feel a little nervous with a camera staring us down, recording our every nuance. I don’t “interview” my subjects. I just want them to talk about their art, what drives them, how they got started and just generally how they feel when they are creating. I want to deliver the emotion of the artist. Expressing how we feel about something drives us to fully engage.

Now it’s time to edit your video down to a manageable size. This can take no time at all or go on for hours. It really depends on the quality of the raw video and how you intend to express your message. The first thing I do is watch the entire un-editied raw video. I am looking for the subject to be relaxed and comfortable. If your subject really doesn’t make it to the point of being visually relaxed, it’s ok. You can strip out the audio and lay the sound track over the slide show for the video portion. If the slide show is at the end of the video, I add a music track to go along with the images. It really depends on the type of art or subject matter, as to the type of music I add. I ask the subject during the initial meeting, what kind of music they like. I create my tracks in Apple’s Garage Band, which is copyright free. If you use music that is owned by someone, you run the risk of being sued. You either create your own tracks, using something like Garage Band, purchase copyright free music or pay a royalty to the owner plus get permission. Most music tracks that have copyright, have a per use fee associated with them. That means every time it plays, there is a royalty that needs to be paid. So if your video goes viral, you could be in for a hefty bill. We’ll talk about how to create music in Garage Band in another blog. Once I have the video edited the way I want it, I export it to a Quicktime movie. I optimize the movie for viewing on YouTube. You can make it HD or save at a higher viewing resolution if you like. YouTube will handle up to 15 minutes of video with a size restraint up to 2 GB of data. Whew…that’s some heavy lifting! Once the video has posted to YouTube, we send our subject the link where the video can be found on our website and encourage them to post the link on their own websites, link to YouTube video directly or post YouTube video itself on their sites. Internet search engines like inbound links to your sites and videos are a great way to encourage those links. It’s a win-win way to promote your client, your art, yourself or your products.

Next time: Making videos ahead of schedule
Feel free to leave a comment and I’ll get in touch.
Making Videos While Stressing Less and Sleeping More

Once I have my subjects signed up and ready for the shoot, I like to make the most of the opportunity. I plan on at least 30 minutes to one hour on-site. I get as much footage as possible so that I can edit to my hearts content and maybe even get enough for TWO videos. If you have interesting subject matter and talent that feels comfortable in front of the camera, you may have a multi-part series. If your subject is comfortable and keeps on talking….keep on shooting. You never know what jewels you can come up with.

Schedule More Than One Subject Per Day
I find that when I am in my groove and setup for shooting, I can get alot done in one day. I try to schedule more than one subject per day. This allows me to focus on shooting when I’m shooting and editing when I’m editing. Same thing for creating the music in Garage Band.

Setup Private Viewing on YouTube
I upload my videos to YouTube but don’t let them go public until I am ready. Once they have been uploaded, I can take them public anytime I want. So if you want your video to go live on the 15th of the month, change your settings and go live on the 15th. It’s just that easy.

If you have questions or suggestions, please leave me a comment.

Next Time: Making Music in Garage Band

Creating Videos for YouTube

In this post, I’ll go over the equipment and software you need to get started.

I’m a graphic designer at Reed Photo Art. Among other things, I design and publish our e-newsletter and create our YouTube videos used in our social networking. So far, all of my work has been done on a 17” MacBook Pro running Mac OSX version 10.6.4 with 4 GB of ram.

Reed Photo-Imaging recently started creating and posting to YouTube short (2-3 minute) videos of our customers and employees. These short segments highlight their experience, tips and tricks they like to share and their professional work. Topics range from fine art photography to well, fine art. Our goals are to promote our customers and to maximize the benefits of adding original content to our web site and Facebook page.

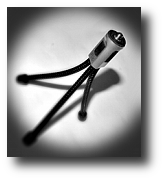
Flip Ultra HD video cameraI started with the Flip Ultra HD video camera by Cisco. This is a compact and easy to carry camera that costs $199.00 suggested retail. You should be able to find a better price online at locations such as Costco or on Amazon.com. I purchased mine at Costco for discounted price of $149.00. The Flip Ultra HD has an 8GB storage capacity which equates to two hours of recording time. The output resolution is a hefty 1280 x 720, which is more than you need for the web. The lens is fixed  going from 1.5m (approx 4.5 feet) toFlip Pod mini tripod infinity. Audio is provided through a built-in mic. The fixed video and the built in sound, in my experience, can be a problem and you have to create a work-around to compensate for them. The video quality is great and the camera is very easy to use. to avoid camera shake when recording the interviews, I used a mini tripod made for the flip called the flop pod.

I use Final Cut Express by Apple for video editing. Final Cut Express is the light-weight version of Final Cut Pro and has limited functionality. Even with it’s limitations, the rice tag of $199.00 can make it an excellent entry level choice until your needs outgrow it’s capabilities.  If you want professional level video editing right away, Final Cut Pro is in the toolbox of many professionals who edit commercial movies.  It can be purchased at any Apple retail store, online at apple.com the App Store or through any certified Apple reseller. Final Cut Express comes with a font animation program called LiveType.

Knowing that any good editing app will have a learning curve, I took a class at Lynda.com, which made the curve much shorter.  Lynda.com costs a reasonable $25 per month, for as many training videos as you can stand to watch in a month. In addition to the audio tools in Final Cut Express, I used an audio scrubbing application called Sound Soap 2. This scrubber essentially washes the audio track of distracting background noise. It does a good job minmizing wind and other noise that may be in the video due to the built-in mic found on the Flip Ultra HD. Sound Soap 2 is made by Bias Inc. Their website is www.bias-inc.com. Sound Soap 2 as a free-standing application is $129.00. If you’re on a Windows machine, try Pinnacle Studio Ultimate Collection 14. Pinnacle Studio is the consumer version video editing software made by Avid.  It retails for $129.00 at www.avid.com.

There are plenty of free ware applications available for video and audio editing, but in that class of software, you usually get just what you pay for. Free apps often suffer from harder to use interfaces and less than stellar results in the end product. There are some excellent exceptions to that statement, but that conversation is outside the scope of this posting. Perhaps we can revisit the freeware options in another series down the road.

If you have used a particular piece of software you are excited about, be sure to leave tell us about it by leaving a comment:

My total startup expenses for the two software packages, video training on Lynda.com and the camera was around $500.00.

Is Film Dead?

Gary Reed, General Manager for Reed Photo-Imaging has been participating in a lively discussion on Rolls of filmLinked-In regarding the supposed obituary for traditional film.

There were 120 posts with a total of 36 Linked-In members responding. Nineteen of the members either were still using film in their personal work or had moved back to using film in their professional work as a “Retro Look.” Eleven members were completely committed to digital and weren’t looking back. In a nutshell, “Film is Dead, move on.” There were six members who were non-committal and more interested in scanning and other aspects of archiving images. Most of the members who were positive as to the future of film were also nostalgic about the look and feel of film as a media. There was discussion about the effects of freezing film.

There were people who felt that you should shoot the film right away to get the maximum color effect. Some members disagreed and thought you should wait until it was partially thawed. It was not only informational but also hilarious at times. A big concern was the future of film processing and the continued manufacture of film from Kodak and Fuji. Gary Reed commented, “As a lab guy I can tell you that our film processing (E-6, C-41, B/W) are way up over the last 2 years. A large part of that is the toy camera market like Holga’s and Diana’s which we believe will help keep film alive as well as the large format people still shooting landscapes. Granted many labs did stop processing film so it tends to funnel to those of us still processing. Fuji tells us that although they discontinued color neg film this year they still have strong sales of transparency and even their B/W films worldwide. Kodak always did beat them up in the color neg arena anyway. Kodak announced some months ago a new 4×5 and 8×10 color neg film coming on-line, Ektar. Go figure. We have been predicting the demise of film for many years but any more I believe it’s going to be around for some time yet. We have also seen the overall quality of photography go down since digital became king. Mostly just sloppy shooting and “I’ll just fix it in photoshop” attitude. The best digital shooters are the people who started with film, hands down. Long live silver halide! “

Gary Reed said, “We sell Kodak neg film about 10 to 1 over Fuji and Fuji E-6 20 to 1 over Kodak’s. Fuji’s black and white never did much but they are staying with it. We figure they have a good market in Japan or somewhere to justify keeping it.

As far as scanning, color neg film generally scans very well but it’s like anything else, you need a good neg to start and a good pilot to get you there. It can be a little tougher than transparency film. When Fuji came out with their pro digital camera all the wedding portrait people loved it for skin tones and that it’s duel chip it could handle contrast like black suite and white dress better than Nikon or Canon. It is a Nikon body but the guts are Fuji. I have not heard anything about a next generation camera. They are however expanding their line of instant cameras which were a huge hit over the past couple years, go figure!“

In conclusion, members who were positive about the continued availability of film expressed the belief that the price was going to go up and that film was going to be a niche market item. Members who were negative about the future of film believed that one day it was just going to be gone due to economic factors that precluded the profitability from both the manufacturer and the labs that process the film.

Featured Artist: Jody Akers Part II

Part II of our one on one with Jody Akers. He discusses fried chicken and toy cameras, specifically his use of the Holga camera. Both color and BW images are featured. Special offer in the video for toy camera shooters. Don’t miss this video.


[social_web_link][/social_web_link]

Featured Artist: Dan Walters

Featured wildlife artist photographer Dan Walters showcases his fine art prints in this videoExtremely talented, Dan Walters has been epitomizing the perfect wildlife shots for years. Practically undiscovered, his body of work is worth more than a passing glance. In this one-on-one artist highlight with the wildlife photographer, Dan discusses his inspirations and techniques for shooting wildlife. He showcases thirteen of his photographs in a slide show that is not to be missed.

<iframe width=”560″ height=”315″ src=”https://www.youtube.com/embed/wEHH-gSbnnw” frameborder=”0″ allowfullscreen></iframe>

[social_web_link][/social_web_link]