How to get Great Color, Save Your Profits, and Never Have to Work Color or Density in Photoshop. Part 2

My last blog post discussed the weakness of TTL metering and the need for spot on exposure to avoid working your files in photoshop. Thus saving money and time which should result in a more profitable business.

Rule #2 – If you don’t have proper white balance, you don’t have correct color.
This seems like a real “DUH!” statement, but it is astonishing how many pro’s still don’t grasp the importance of this.
Using auto white balance in a high-end professional workflow is a bad idea? Auto WB works if you have absolute
neutrals in your image, and even then it can be fooled by bright or near neutral tones in your subjects. If you are not getting consistent skin tones from sitting to sitting, or indoor to outdoor it’s time to adopt custom WB in your capture work-flow. And you wouldn’t dream of passing these auto white balance inconsistencies on to your final client prints – right?
The brief amount of time it takes to get an accurate custom white balance by using an accurate target can, and likely will, save your studio hours of Photoshop time.
And I am sure you know that in a pro studio:
Hours = (Profit – Dollars + extra time you could be getting more business).
And if you are paying staff to deal with exposure and white balance issues, don’t forget to add in payroll taxes and benefits to that equation. With accurate white balance control, you will NOT need to adjust the color of your files. Assuming of course that your camera is in a good state of repair. It is rare that the preset white balances on your camera will be accurate enough for professional standards.

To get an accurate WB, you need an accurate target.
If you are using a Kodak Grey card or one of those black/white/gray targets or a plastic over-the-lens diffuser, I would invite you to upgrade to something more accurate. If quality and/or profit margin are your #1 concerns; above all else get the most accurate WB target available. The Balance Smarter from the smart folks at BalanceSmarter.com.
Your color is only as good as the WB target you use. If you skimp here, you’ll pay the price later in additional work or reprints. Is it worth the risk?. After spending thousands on education, good gear and marketing to get business, seems a shame to put the investment and your reputation all on the line using a cheapo calibration target or tool.

If you are still tempted to take shortcuts during the shoot, every time you have the thought ” I’ll just fix it in Photoshop later”, say to yourself instead:
” I’ll just spend the time and money to fix it in Photoshop later”
Be Honest, isn’t the latter REALLY what you would be doing?

Next week:
Rule #3 – Using the right colorspace = great prints!
Larger and Faster Storage is on the Horizon

Larger and faster storage is on the horizon!
At the current rate at which silicon-based technology doubles – approximately every 18-24 months, it won’t be long before our cameras outgrow their present storage form-factors. Nikon, SanDisk and Sony have announced their joint effort for a new portable storage specification aimed at meeting the future needs of music playback devices, digital cameras and video capture devices in a new standardized format.

The new proposed specs show a transfer rate of 500 Megabytes per second – far exceeding the present 167 Megabyte per second of the current CompactFlash specifications. Yes, that is a full gigabyte transferred every two seconds. The maximum theoretical storage capacity for the new devices are expected to exceed two Terabytes. These new memory cards are planned to be rugged, similar in size to the existing SD form-factor and have a lower power consumption and longer battery life – thanks to integrated power scaling. With the data speeds and power savings, I suspect we will see this new technology integrated as solid state drives (SSD’s) on laptops, smart phones, and other intelligent devices in sectors like medical and transportation. A projected production date for the new cards was not announced.

Save $1,298.32 by Building Your Camera From a Kit

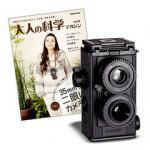
For this week I’ve decided to tell you about one of my new favorites, the 35mm Do-It-Yourself
camera or the Gakken Flex
. This is a 35mm TLR (twin lens reflex) that you build yourself. The first thing that drew me to this camera was that it is a TLR, I have always wanted one, but they can be pricey. The second thing was that I got to put it together.

Gakken is produced by Otonanokagku, and each volume is a different science lesson. The kits have ranged from Theremins to Computers, Cameras, Phonographs and more. Each comes with a beautifully produced magazine that tells the history of the subject that you will be working on. Volume 25 has a great history of film and photography. Because of the popularity of these cameras they are being distributed by Recesky without the magazine, and can be found at Four Corner Store (Check to make sure they have them in stock.) I enjoyed putting it together, but really struggled because the instructions are in Japanese, and as I don’t speak or read Japanese I only had pictures to go from. The focus ranges from approximately 1ft. to infinty, there is only 1 appeture setting (best to use in bright sun), and there is only 1 shutter speed, approximately 1/60.

The great thing about these little darlings is that they use 35mm film, so you can get the film processed almost anywhere. The downside is that the frame is slightly larger than a regular 35mm so it will get cropped unless you have a special scan. But don’t fret, I have customized one of our scanners so you can get the whole frame, you just send your film to Reed Art & Imaging for the processing, proofing and scanning.

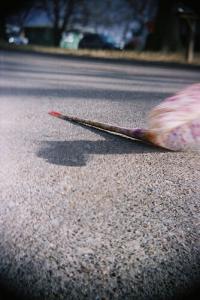
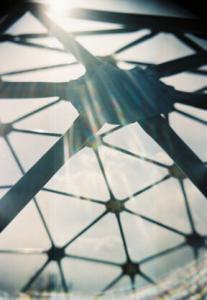
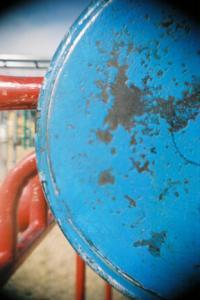
Here are some sample images that I have taken with mine. Note that you still get the blurred, vignette edges.

Photograph of a chinese yo-yo taken with a Gakken FlexPictured titled "Jungle Flare" taken with a Gakken FlexPicture titled "Steering Wheel" taken with a Gakken Flex

How to Add More Fun to Your Holga

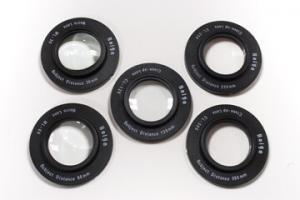
Let’s talk about a fun accessory available for your Holga, the Macro and Close Up lens sets.Lens accessories for Holga toy cameraa These do have to be purchased separately, and they can be found at my two recommended shops, Four Corner Store and Light Leaks. These lenses just slide onto the front of the Holga lens, it is a tight fit so make sure to get them on all the way as it will effect the distance.

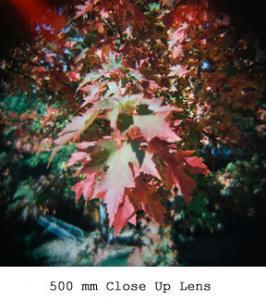
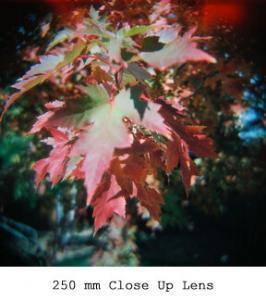
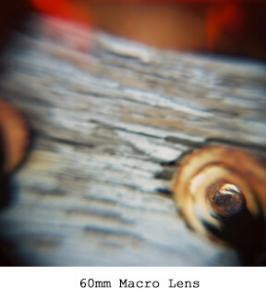
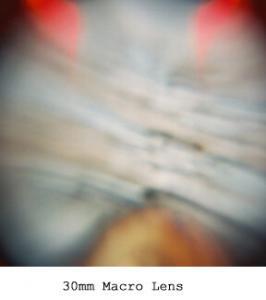
There are 5 lenses, 3 in the Close Up set and 2 in the Macro set. The Close Up set contains a 500mm, 250mm and 120mm. The Macro set contains a 60mm and 30mm. The tricky thing with these is getting the distance. For me it is easier to think of them in centimeters, mainly because I don’t have a measuring device that has millimeters on it. I have experimented with them a couple times and this last time was when I finally got something decent. With the Macro set it has been suggested that a flat object is best, I am still on the fence about that one. When using these lenses it is important to remember that the focusing distance is from the front of the lens. My first attempt, was measuring from the front of the camera. The Holga should be set to infinity when using the close up & macro lenses. Remember when using the Macro lenses because of the short distance the camera could block the light on the subject causing it to be too dark.

If you like Macro and Close Up photography this is definitely something you should add to your collection. Below are samples of what I got over the weekend. Don’t forget to leave questions or comments. Later!

500 mm lens accessory for Holga Camera250 mm lens accessory for Holga Camera60 mm lens accessory for Holga Camera30 mm lens accessory for Holga Camera

He Took a Risk and Landed the Shot

I have a fun story to share with you this week. I like to go out with a friend of mine and we both love take our Holgas. We always have fun and get some incredible shots. The thing I love most is how we will be at the same place, yet see and capture such diverse aspects. For one of our trips I wanted to journey back in my childhood, so we went to the elementary school I attended and a couple of the local parks I used to love going to. I went to photograph the old playground equipment that I used to play on everyday. I decided to invite my friend along to see how his shots might vary from my own, being that I had a emotional tie to the location and he didn’t.

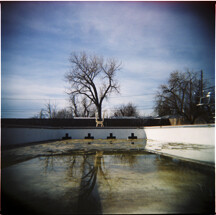
Empty pool in the spring with melted snow runoffWe started the day at the elementary school and then headed over to the local park. The park is right next to a public swimming pool and a skate park. It was April so the pool was still closed for the winter, however, there was some water from melted snow. My friend decided he had to get a picture in the pool, so he jumped the fence to get the shot he wanted. While, I do not encourage or condone trespassing, a great photographer will do what is needed to get the shot. The park was busy with families out and about, it was one of the first nice days of the year, and I was concerned that he would get caught. Before he jumped the fence I told him I would play dumb and pretend I didn’t know him if he got caught, I also told him I wouldn’t pay bail . However, he managed to get in and out without any incident and ended up with a great shot (see left).

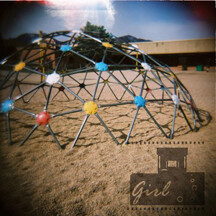
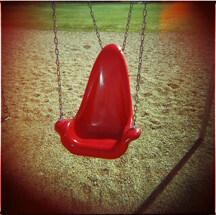
Below are a shot I took and a shot my friend took, as an example of how people photograph things differently. My shot is on left.

Geodesic playgroundRed Swing on playground


Have you taken any risks just to get the shot? Tell us your story. See you soon!

1 Easy Choice that Can Add Greater Creativity to Your Toy Camera Photos

Thanks for joining me again in our journey of toy cameras. I am going to answer the question: What are the different options once you have a exposed roll from your toy camera? Due to the fact that these toy cameras use either 120 film or a different aspect ratio on 35mm film you need to find a lab that can process Diana or Holga films, as your neighborhood 1 hour photo lab usually can’t. Which is why I am going to encourage you all to send your film to Reed Art & Imaging, because, well, this is a blog for Reed Art & Imaging. There are several toy camera enthusiasts working here and we take great pride in giving you the best from your toy cameras.

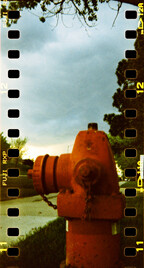
Picture named "Fire Hydrant" with normal film development

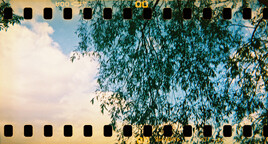
There are 3 types of film you can use in a toy camera, E-6 slide film, C-41 color negative film, or B&W negative film. If you are using either C-41 or E-6 these can also be artistically enhanced through a technique called: cross-processing. To cross-process you would process your C-41 negative film thru E-6 chemistry to get a slide or vice verse, E-6 slide film thru C-41 chemistry to get a negative. It is the chemistry that determines if the final film is a negative or a slide – not the film. This is a fun experiment I would encourage you to try as it causes an increase in contrast as well as unnatural colors. Check out the samples at the end of this article.

Whether cross processing or using normal film developing services, once the film gets processed there are a few options you have to choose from: There are proof prints, scans or contacts. With E-6 film it is already a positive, so you can’t contact them, however you can proof or scan them. I personally like to do small scans, usually 6mb, so that I can post them on facebook, my website and use them for editing. Several people choose to get proof prints, either 5×5 or 4×6 depending on the format of the mask you use. If you choose proof prints there is also an option to get a CD as well.

You may be asking yourself, “How do I know which type of film to use?”. This can be a difficult decision, but I will try to make it a little easier for you. I usually do not recommend using E-6 film, unless you are planning to cross-process. E-6 film is very sensitive and if your exposures are not accurate the images will be too light or dark, because of the limited control in your toy camera it is difficult to get the perfect exposure. C-41 color negative film or B&W negative film have more range in their exposures. WithCross processed film either you can be over- or under-exposed by almost a stop and still get usable images. With most toy cameras it is best to use a 400 ISO speed film. However, I would recommend experimenting for yourself. Just go out and have fun!

Next week I’m going to lighten it up a bit and let you know about some of the adventures in shooting I have had. Leave any comments or questions for me below. See you soon!

Above images taken with Fuji E-6 film and cross processed in C-41 chemistry.

Creating Videos for YouTube

In this post, I’ll go over the equipment and software you need to get started.

I’m a graphic designer at Reed Photo Art. Among other things, I design and publish our e-newsletter and create our YouTube videos used in our social networking. So far, all of my work has been done on a 17” MacBook Pro running Mac OSX version 10.6.4 with 4 GB of ram.

Reed Photo-Imaging recently started creating and posting to YouTube short (2-3 minute) videos of our customers and employees. These short segments highlight their experience, tips and tricks they like to share and their professional work. Topics range from fine art photography to well, fine art. Our goals are to promote our customers and to maximize the benefits of adding original content to our web site and Facebook page.

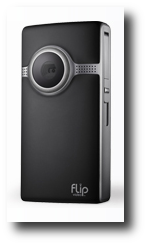
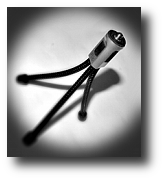
Flip Ultra HD video cameraI started with the Flip Ultra HD video camera by Cisco. This is a compact and easy to carry camera that costs $199.00 suggested retail. You should be able to find a better price online at locations such as Costco or on Amazon.com. I purchased mine at Costco for discounted price of $149.00. The Flip Ultra HD has an 8GB storage capacity which equates to two hours of recording time. The output resolution is a hefty 1280 x 720, which is more than you need for the web. The lens is fixed  going from 1.5m (approx 4.5 feet) toFlip Pod mini tripod infinity. Audio is provided through a built-in mic. The fixed video and the built in sound, in my experience, can be a problem and you have to create a work-around to compensate for them. The video quality is great and the camera is very easy to use. to avoid camera shake when recording the interviews, I used a mini tripod made for the flip called the flop pod.

I use Final Cut Express by Apple for video editing. Final Cut Express is the light-weight version of Final Cut Pro and has limited functionality. Even with it’s limitations, the rice tag of $199.00 can make it an excellent entry level choice until your needs outgrow it’s capabilities.  If you want professional level video editing right away, Final Cut Pro is in the toolbox of many professionals who edit commercial movies.  It can be purchased at any Apple retail store, online at apple.com the App Store or through any certified Apple reseller. Final Cut Express comes with a font animation program called LiveType.

Knowing that any good editing app will have a learning curve, I took a class at Lynda.com, which made the curve much shorter.  Lynda.com costs a reasonable $25 per month, for as many training videos as you can stand to watch in a month. In addition to the audio tools in Final Cut Express, I used an audio scrubbing application called Sound Soap 2. This scrubber essentially washes the audio track of distracting background noise. It does a good job minmizing wind and other noise that may be in the video due to the built-in mic found on the Flip Ultra HD. Sound Soap 2 is made by Bias Inc. Their website is www.bias-inc.com. Sound Soap 2 as a free-standing application is $129.00. If you’re on a Windows machine, try Pinnacle Studio Ultimate Collection 14. Pinnacle Studio is the consumer version video editing software made by Avid.  It retails for $129.00 at www.avid.com.

There are plenty of free ware applications available for video and audio editing, but in that class of software, you usually get just what you pay for. Free apps often suffer from harder to use interfaces and less than stellar results in the end product. There are some excellent exceptions to that statement, but that conversation is outside the scope of this posting. Perhaps we can revisit the freeware options in another series down the road.

If you have used a particular piece of software you are excited about, be sure to leave tell us about it by leaving a comment:

My total startup expenses for the two software packages, video training on Lynda.com and the camera was around $500.00.

Getting the Best Possible Print from Your Fine Art Lab. Part 2 of 5

Is File Format Actually Important?

Last week in part 1, I wrote about a print being the total sum of all the parts in the workflow and how each part plays a role. We also touched on the importance of proper exposure for a good starting place. As promised, this week I expand the parts to cover gear and the common question of file formats.

Good gear.
If your lenses are of poor quality, don’t expect your images to be ready for fine art printing. Aberrations distortions and flares, like exposure, can only be somewhat compensated for, but not completely repaired in Photoshop. ANY distortion corrections in Photoshop means that your pixel data will be re-sampled. And re-sampled means it will be softened. Flairs, result in lowered contrast that equates to lessened detail, and repairing apo-chromatic errors requires re-sampling one or more channels. It’s preferred to handle this during raw conversion  but it still requires a re-averaging or re-sampling of pixel data.

File format.
For a fine art image, Unless jpeg artifacts are part of your style, (see my blog post on tiff versus jpg issues here) I recommend that the image be captured in an uncompressed raw format. Some camera manufacturers force users into either jpeg or compressed raw formats. For the wedding and portrait guys. This is usually fine. Their critical gamut for color lies mostly in the skin tone ranges of their subjects and the rest of the world is secondary. In a fine art print, the rest of the world is the artists domain and critical for color. JPEG compression throws color information away first at the higher quality levels, then moves on to also discarding density detail as the compression level increases. I have yet to see a digital camera that will hold the same level of color fidelity in the compressed file, that can be had in an uncompressed raw file. With the rapid pace of camera development, I imagine this issue will be corrected in a few years, if not sooner. I suppose we’ll just have to wait.

Do as much of your color correction, saturation work, density tuning and sharpening during the raw conversion process as you can.  Any resampling of color post-conversion can lead to lesser results when levels of density in each color channel are expanded, leaving gaps that cause rapid transitions in color, or compressed, causing a loss in color fidelity. Am I nit-picking here? Could be. But remember, the topic is getting the best possible print.  Nit-picking get’s you to that end. Shortcuts might get you an acceptable print, just not the best print possible.

File conversion.
The software used to convert your raw files can also go a long way to make or break your image.  For several years, I have been using Bibble Pro to convert my raw files. Side by side tests with current adobe products show that Bibble preserves more color fidelity and introduces virtually zero artifacts into my files. Adobe products appear to be using an interpolation scheme that sometimes creates zipper lines on hard edges and at other times, completely softens color detail in some of the channels.  When my distant Autumn aspen trees look like cotton candy in the red channel, missing all semblance of leaf detail, something is horribly wrong with the adobe raw converter.  Prior to final file work, I always convert my raw files to a tiff in a decently sized working space such as ProRGB or Adobe 1998. Especially for anything I will be printing on either photographically on the Lightjet or Pigment on watercolor or canvas.

Let me know your thoughts. I would love to hear your ideas.

Next from me: Sweetening the print through fine-tuning.

How big can I print my file?

Here is another great question we hear quite often. Sometimes more than once a day. So it seems low resolution file showing pixelsa relative bit of information to pass along here to our blog reader friends.

There are two valid answers to this, depending on whether we look at this as a relative issue or a subjective one. As a relative issue, we use math to compare number of file pixels versus output resolution. Subjectively we look at quality as simply a matter of personal taste – what I like to call “The quality to pain threshold”. Or how big can we go before the quality drops to where it becomes painful to look at or pay for.

First, in either point of view, image quality is more than just the number of pixels contained in the medium resolutionfile. For a simple example; a modern 24 mega-pixel file shot out-of-focus will be of lesser quality than a properly focused 4 mega-pixel file.

Let’s look at the relative approach first, since most folks like easy and firm answers, such as 2+2 always = 4, and George Washington was the first US prez.

The easy answer is achieved with simple math:

File pixel dimension ÷ minimum input resolution = output dimension.

Consider this:
The example camera has a pixel dimensions of 2000×3000 (6 mega-pixel)
and the example device wants a minimum of 300 ppi (pixel per inch) file resolution.Full resolution file uncropped

2000÷300 = 6.66″
3000÷300 = 10.00″
The largest maximum quality print size would be: 6.67″ x 10.0″

If your printer recommends a minimum of 150 ppi:

2000÷150 = 13.33″
3000÷150 = 20.00″
The largest minimum quality print size is 13.33″ x 20″

If your file is from a 24 mega-pixel camera with dimensions of 4000×6000:

4000÷150 = 26.66″
6000÷150 = 40.00″
The largest minimum quality print size would be 26.66″ x 40.00″

With the subjective approach, there are limited fixed answers. The size of output is usually limited by one or more of the following factors:

* The physical limitations of the printing device.
* Your budget.
* How ugly you are willing to accept it.

At some point the cost of the print will break your budget. That is a hard and fast limitation. So that’s easy – you can print as big as you want to go as long as you can afford the print.
The printing device or medium will support a maximum specific size. For instance, some ink jets will not print any larger than 40″ wide, but they will go several hundred inches long. You can’t go any larger unless you pick a different printing device or you print in multiple tiles and deal with matching the seams. If you are willing to do the latter, then your budget is again your limit.

The subjectivity comes in with your opinion. How big is too big before the quality drops below your level of acceptance – your threshold of pain. Or you might call it the “Yuck factor”. When you get to a level of enlargement that degrades the quality to a point where you don’t like the results, you have hit your threshold of pain. In essence, you see the print and say “Yuck! That’s one ugly print and I’m not willing to pay money for it”

What does the yuck point look like? I can’t answer that for you, only you can. My level of acceptability may be different than yours. A professional’s need for quality is likely higher than that of the average consumer due to experience and training. Because of this experience, the professional will usually hit his/her level of pain sooner than the consumer.

Digital Photographs: Lost but not Forgotten

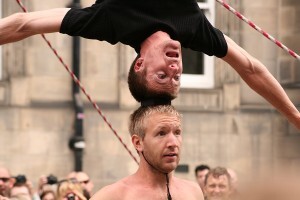
I just can’t help it when I see articles about lost photographs. I feel the urge to expose someone Balancing act with street performerselse’s pain on to everyone and anyone who cares to listen. Last week I wrote about saving your memories (photo albums) from a natural disaster like the fires in Boulder Canyon here in Colorado. People have been rescuing their photos for many years by grabbing their “photo albums” and running for safety.

I personally have not read about anyone grabbing their computer, CD’s or whatever they have their digital photo’s on and running out of the house. It’s probably happened somewhere and I would hope people would consider their digital images to be just as valuable as their printed photo albums. Then again, we are in the digital age where people share their photos on face book and cellphones and never even consider a print as a way to show off an image.

Consider this story I read in the Denver Post just this week. A staff writer misplaced her cellphone one morning on the way to work. Was it forgotten at the gas station, left under a pile of stuff in the car or misplaced at home somewhere? Either way by the end of the article it still was not found. Several things run through a persons head when their cell phone goes missing like what about all the information I have stored in there? It’s not only a hassle to replace but time and expense too, at least for what you can replace.

This writer mentioned being distraught over several photos taken with the MIA phone that could not be replaced. Maybe not life changing images but something deemed worthy of taking and saving in the first place. The fact that so many cell phones are lost, broken or destroyed every day that contain photographs that will never see the light of day again makes me pucker, at least a little bit but probably not as much as the person that lost them but it’s still not a pleasant experience. So what’s the moral of the story here? No moral, just an observation from me about how photography has become such a disposable act anymore. People shoot like crazy because it’s fun to record images of events and people’s lives they are part of. The sad thing is that when a new cell phone/camera model comes out those images are usually not saved. As I have been told by more teens and twenty-somethings than I care to remember, “it’s no big deal, we’ll just shoot more!” I hope they all have really good photographic memories because that’s all they may have in the future.