How to get Great Color, Save Your Profits, and Never Have to Work Color or Density in Photoshop. Part 2

My last blog post discussed the weakness of TTL metering and the need for spot on exposure to avoid working your files in photoshop. Thus saving money and time which should result in a more profitable business.

Rule #2 – If you don’t have proper white balance, you don’t have correct color.
This seems like a real “DUH!” statement, but it is astonishing how many pro’s still don’t grasp the importance of this.
Using auto white balance in a high-end professional workflow is a bad idea? Auto WB works if you have absolute
neutrals in your image, and even then it can be fooled by bright or near neutral tones in your subjects. If you are not getting consistent skin tones from sitting to sitting, or indoor to outdoor it’s time to adopt custom WB in your capture work-flow. And you wouldn’t dream of passing these auto white balance inconsistencies on to your final client prints – right?
The brief amount of time it takes to get an accurate custom white balance by using an accurate target can, and likely will, save your studio hours of Photoshop time.
And I am sure you know that in a pro studio:
Hours = (Profit – Dollars + extra time you could be getting more business).
And if you are paying staff to deal with exposure and white balance issues, don’t forget to add in payroll taxes and benefits to that equation. With accurate white balance control, you will NOT need to adjust the color of your files. Assuming of course that your camera is in a good state of repair. It is rare that the preset white balances on your camera will be accurate enough for professional standards.

To get an accurate WB, you need an accurate target.
If you are using a Kodak Grey card or one of those black/white/gray targets or a plastic over-the-lens diffuser, I would invite you to upgrade to something more accurate. If quality and/or profit margin are your #1 concerns; above all else get the most accurate WB target available. The Balance Smarter from the smart folks at BalanceSmarter.com.
Your color is only as good as the WB target you use. If you skimp here, you’ll pay the price later in additional work or reprints. Is it worth the risk?. After spending thousands on education, good gear and marketing to get business, seems a shame to put the investment and your reputation all on the line using a cheapo calibration target or tool.

If you are still tempted to take shortcuts during the shoot, every time you have the thought ” I’ll just fix it in Photoshop later”, say to yourself instead:
” I’ll just spend the time and money to fix it in Photoshop later”
Be Honest, isn’t the latter REALLY what you would be doing?

Next week:
Rule #3 – Using the right colorspace = great prints!

6 Easy Tips to Avoid Trouble With Your E-Letter

When Reed Art & Imaging decided to publish an electronic newsletter. I went on an expedition to investigate what was the best software to use and how to comply with the anti-spam laws. Initially I tried two programs; Constant Contact and Autoresponder. Constant Contact has templates that were fairly easy to edit and use. I initiated a trial with Constant Contact for 60 days. During that time, I worked with their templates and basically had a test drive. I found Constant Contact, fairly easy to use. Autoresponder allowed me to cut and paste the code in from Adobe Dreamweaver. I used Adobe’s Dreamweaver to design and create the HTML e-letter. We used Autoresponder to send out the e-letter. We currently use A Better Email which has some great features. All of these programs helped you to comply with the CAN_SPAM act. These federal laws, must be followed or you can be heavily fined. Here’s the website address to download a pdf file of these requirements from the Federal Trade Commission.:

http://business.ftc.gov/documents/bus61-can-spam-act-Compliance-Guide-for-Business

Below is a rundown of CAN-SPAM’s main requirements:

Don’t use false or misleading header information.
Your “From,” “To,” “Reply-To,” and routing information – including the originating domain name and email address – must be accurate and identify the person or business who initiated the message.

1) Don’t use deceptive subject lines.
The subject line must accurately reflect the content of the message.
Identify the message as an ad. The law gives you a lot of leeway in how to do this, but you must disclose clearly and conspicuously that your message is an advertisement.
Tell recipients where you’re located. Your message must include your valid physical postal address. This can be your current street address, a post office box you’ve registered with the U.S. Postal Service, or a private mailbox you’ve registered with a commercial mail receiving agency established under Postal Service regulations.

2) Tell recipients how to opt out of receiving future email from you.
Your message must include a clear and conspicuous explanation of how the recipient can opt out of getting email from you in the future. Craft the notice in a way that’s easy for an ordinary person to recognize, read, and understand. Creative use of type size, color, and location can improve clarity. Give a return email address or another easy Internet-based way to allow people to communicate their choice to you. You may create a menu to allow a recipient to opt out of certain types of messages, but you must include the option to stop all commercial messages from you. Make sure your spam filter doesn’t block these opt-out requests.

3) Honor opt-out requests promptly.
Any opt-out mechanism you offer must be able to process opt-out requests for at least 30 days after you send your message. You must honor a recipient’s opt-out request within 10 business days. You can’t charge a fee, require the recipient to give you any personally identifying information beyond an email address, or make the recipient take any step other than sending a reply email or visiting a single page on an Internet website as a condition for honoring an opt-out request. Once people have told you they don’t want to receive more messages from you, you can’t sell or transfer their email addresses, even in the form of a mailing list. The only exception is that you may transfer the addresses to a company you’ve hired to help you comply with the CAN-SPAM Act.

4) Monitor what others are doing on your behalf.
The law makes clear that even if you hire another company to handle your email marketing, you can’t contract away your legal responsibility to comply with the law. Both the company whose product is promoted in the message and the company that actually sends the message may be held legally responsible.

5) Do not ‘buy’ a list.
The best results always come from people who opt in and that know or know of you. Also, Constant Contact does not allow you to use purchased lists. We work within our own customer base or use an opt-in to receive the e-letter. We include an unsubscribe feature and honor any request we receive to opt-out from receiving the e-letter.

5) Make Your E-Letter Unique!
Our e-letter has monthly contests that I find. We hold frequent contests for our Facebook fans too! Every week the theme changes and around once a month we hold a contest and the winner is chosen by the amount of likes that their image receives. Whenever we find something that promotes a community group, we try and let our readers know about it. Additionally we promote through a short video, selected customers. Each video has an interview and a slide show of the customers work. One of our core beliefs, is that when our customers win, we win.

How to Get Great Color, Save Your Profits, and Never Have to Work Color or Density in Photoshop. Part 3

My last two blog posts discussed the critical need for spot-on metering and absolute correct white balance to avoid working your files in photoshop. Thus saving money and time which should result in better prints and a more profitable business.

Rule #3 – correct working space + Printer space = Great Print!
Digital cameras work extremely well in the sRGB space, and coincidentally, the Fuji Frontier/Noritsu printers of the world are designed to work within that space. Hmmmm, wonder why that would be….

Straight up – an sRGB work flow is your direct channel to go from camera to print. Shooting in Adobe1998 will not gain you any tonal range in the file. Both color spaces have the same levels per channel limit. And this is based on your camera’s bit depth, not your choice of working color space. Neither will any get whiter than 255, 255, 255 and neither will get any darker than 0,0,0.
You have black to white and the same number of levels in both. The gains are in the number of available colors. The larger the space the more colors. Typically these relate to high saturation colors that don’t often show up in most scenes.

These benefits of specific color spaces come into play on the output. Shooting in a color space that does not approximate that of your output device can lead to unpredictable color unless you are willing to spend the time converting to the output profile via a color managed workflow. That step can be sped up using batch processing, Remember, the goal here is to reduce your work load and still get a great print –  right?  Supplying a file to your printer in a mis-matched color space can result in saturation, contrast and color issues that will require intervention to get a good print. Again; Intervention = additional cost.

If you are shooting portraits and weddings, the largest percentage of your work prints 12×18 or smaller right? This means they go to our Fuji Frontier for printing on professional paper.
When  your work is more along the lines of fine-art, we strongly recommend a properly color managed work-flow that includes the use of output profiles. Your takeaway: Shoot in sRGB when printing to sRGB type devices. When printing to higher gamut devices, or when in doubt, shoot Adobe 1998 and convert to the output profiles.

Using the steps described in this series so far, you are well on your way to a slimmer, faster and more profitable work-flow. Barring any need for retouching, you should be able to go straight from camera to output and get a fantastic print.  Give it a try and let us know how it worked out for you.

Next week: Part 4. Picking the file format.

How to Get Great Color, Save Your Profits, and Never Have to Work Color or Density in Photoshop. Part 4

In the previous post in this series, I wrote about using sRGB for printing your studio work.
This post we talk about how JPEG can be your workflow friend.

Rule #4 – JPEG has benefits.
Shooting raw has its place. Like when the dynamic range of the scene far exceeds that of your camera. Or when you need to really fine-tune an image. But-if you are shooting raw because you aren’t getting good results in-camera with jpeg, please re-visit rules 1, 2, and 3. If you get the first three crucial elements in place, you won’t need raw for your portrait and senior work. Shooting in JPEG eliminates the steps required to convert from camera raw. If your image sensors are clean, and you have all the other elements in place you can send your files direct for printing/proofing without any further work, barring retouch or enhancements of course. This process may not be ideal for fine-art or landscape shooters, but it can be ideal for portrait and wedding shooters.

If you choose to shoot JPEG files, set your camera for maximum size files and the largest pixel dimensions. And be careful with just how much sharpening you allow the camera to apply. Too much sharpening and you might get too much pore detail on the closeups. Too little and the image will of course look soft. Excessive sharpening also limits just how large you can print the file before the sharpening artifacts become painfully obvious. Spend a little time testing now, and you’ll have the confidence to know later that your files will look great right out of the camera.

Rule #5 – Print on quality photographic paper.
This means professional paper. Not the over contrasty, over saturated non-neutral stuff you get from drug stores, discount marts, warehouse/membership stores. This means use a good pro lab. Not Costco, not Wal Mart, not Walgreens, not Drug Emporium, etc etc etc.

The papers you get from consumer mini-labs are purposely manufactured to NOT have accurate color. Yep, they make it screwy on purpose. You see, Joe Consumer likes prints with colors that aren’t real. They want false saturation and contrast for that extra snap. In most cases, their photos benefit from that assistance to help the snap-shot look a bit more appealing to the eye.

Professional paper is manufactured to very exacting standards to achieve neutral balance, correct saturation and excellent skin tones. Pro papers will handle extra saturation if you really need it for your “look”, so add it if you wish, but at least you have the option. And get this, just by using pro papers, you get an additional stop of shadow detail! That’s right, you get deeper blacks with pro papers. This means you can actually get a snappier looking print and hold shadow detail when your files are setup correctly.  A properly exposed, correctly white balanced image with great composition that is printed on professional photographic paper won’t need the artificial extra punch to compensate.


So there you have it, the keys to establishing a profitable and expedient workflow.

  1. For spot-on exposure and excellent detail use a professional incident meter, not TTL
  2. Perfect color comes from accurate white balance using a high-end accurate digital-ready target
  3. Using a colorspace that most closely matches your output device will speed up workflow and minimize color shifts
  4. For the studio, JPEG files will expedite your production and get you to print faster
  5. The most accurate color and deepest tonal ranges come from printing on professional papers.

We would love to hear how this all works out for you. Do you have other workflow tips you would like to share? Post them in the comments section.

Making YouTube Videos: Staying Organized and Spending Less Time Doing It.

The creative person inside of me always wants to go with the flow, let my creative juices just start to simmer and pretty soon I’ll have created something great. Well as much as I wish that’s the way it worked for my videos, it doesn’t. The devil is in the details. I have to think two steps ahead before I move one step forward.

We love making YouTube videos but we also stream them each month via our e-letter, website and Facebook page. That doesn’t sound like too much effort, right? Here are the steps I go through in the process of creating a YouTube video about 2-3 minutes long.

First of all, you have to find the talent (that’s the subject of your video). I look for someone that seems like they would be reasonably comfortable talking about their work. Genuine enthusiasm is contagious. The viewer knows when someone loves what they do. Whether you are videotaping an artist or a CEO of a company, you want your “talent” to love their chosen profession. Now that I have chosen my subject, I must get them onboard with the project. I contact them to schedule an initial appointment to discuss their art, what the video will be about and how we will use it. Take the time to get to know a bit about what it is they do. Since I video fine artists and photographers, I look at their art as some of it will be incorporated into the video. Approach them with the idea that this video is good exposure for them. As a safety net for them, give them the opportunity to view the video prior to posting it on YouTube. As a marketing tool, engaging videos are great. Potential consumers love videos!

It’s time for the first meeting. Getting a signed release is a good idea, and the first meeting is as good a time as any to get one. Make sure to agree on a schedule for the video shoot before you leave the meeting. Let the subject know to plan on a 1 to 1.5 hour slot for the actual shoot. Your subject is most likely excited about the project and getting the date of the shoot out of the way means you save time with back and forth phone calls or e-mails. That part is now done and you can move on to planning the shoot! Most of our videos have the element of a slide show edited into them. Generally that’s about 10-15 images one to one-and-a-half minutes per 2-3 minute video. During the initial meeting, ask them to supply digital images of their art or products (whatever it is that drives your subject). You can pick those up from them at the shoot. Adding additional content adds interest for the potential viewer and builds up the posture of the subject. The more your viewer is engaged, the more attention will be paid to your video, and the more professional you subject comes across, the more authority your video has as a marketing tool. You want the viewers to tell their friends, and engaging and informative can go a long way to get your video some exposure.

So far you have invested 1-2 hours in planning and meeting with your next potential star. Not too bad. Now it’s time to get behind the camera and shoot the video. Plan on shooting 7-15 minutes of raw video for 2 minutes of finished product. It could take you an hour or so to get this much material. Out-takes and other unexpected issues will eat a fair amount of extra time. Out of that raw video you will either edit out your 2 minutes max or you’ll have enough for a series of videos that you can use down the road. Double or triple your time based on how long the final video should be. There is setup, sound testing (it’s a good idea to do a short recording to ensure everything is hooked up correctly and your settings are correct, prior to shooting the real footage), and in general making the talent feel comfortable. Most of us are not professional actors and as such, feel a little nervous with a camera staring us down, recording our every nuance. I don’t “interview” my subjects. I just want them to talk about their art, what drives them, how they got started and just generally how they feel when they are creating. I want to deliver the emotion of the artist. Expressing how we feel about something drives us to fully engage.

Now it’s time to edit your video down to a manageable size. This can take no time at all or go on for hours. It really depends on the quality of the raw video and how you intend to express your message. The first thing I do is watch the entire un-editied raw video. I am looking for the subject to be relaxed and comfortable. If your subject really doesn’t make it to the point of being visually relaxed, it’s ok. You can strip out the audio and lay the sound track over the slide show for the video portion. If the slide show is at the end of the video, I add a music track to go along with the images. It really depends on the type of art or subject matter, as to the type of music I add. I ask the subject during the initial meeting, what kind of music they like. I create my tracks in Apple’s Garage Band, which is copyright free. If you use music that is owned by someone, you run the risk of being sued. You either create your own tracks, using something like Garage Band, purchase copyright free music or pay a royalty to the owner plus get permission. Most music tracks that have copyright, have a per use fee associated with them. That means every time it plays, there is a royalty that needs to be paid. So if your video goes viral, you could be in for a hefty bill. We’ll talk about how to create music in Garage Band in another blog. Once I have the video edited the way I want it, I export it to a Quicktime movie. I optimize the movie for viewing on YouTube. You can make it HD or save at a higher viewing resolution if you like. YouTube will handle up to 15 minutes of video with a size restraint up to 2 GB of data. Whew…that’s some heavy lifting! Once the video has posted to YouTube, we send our subject the link where the video can be found on our website and encourage them to post the link on their own websites, link to YouTube video directly or post YouTube video itself on their sites. Internet search engines like inbound links to your sites and videos are a great way to encourage those links. It’s a win-win way to promote your client, your art, yourself or your products.

Next time: Making videos ahead of schedule
Feel free to leave a comment and I’ll get in touch.
Larger and Faster Storage is on the Horizon

Larger and faster storage is on the horizon!
At the current rate at which silicon-based technology doubles – approximately every 18-24 months, it won’t be long before our cameras outgrow their present storage form-factors. Nikon, SanDisk and Sony have announced their joint effort for a new portable storage specification aimed at meeting the future needs of music playback devices, digital cameras and video capture devices in a new standardized format.

The new proposed specs show a transfer rate of 500 Megabytes per second – far exceeding the present 167 Megabyte per second of the current CompactFlash specifications. Yes, that is a full gigabyte transferred every two seconds. The maximum theoretical storage capacity for the new devices are expected to exceed two Terabytes. These new memory cards are planned to be rugged, similar in size to the existing SD form-factor and have a lower power consumption and longer battery life – thanks to integrated power scaling. With the data speeds and power savings, I suspect we will see this new technology integrated as solid state drives (SSD’s) on laptops, smart phones, and other intelligent devices in sectors like medical and transportation. A projected production date for the new cards was not announced.

Save $1,298.32 by Building Your Camera From a Kit

For this week I’ve decided to tell you about one of my new favorites, the 35mm Do-It-Yourself
camera or the Gakken Flex
. This is a 35mm TLR (twin lens reflex) that you build yourself. The first thing that drew me to this camera was that it is a TLR, I have always wanted one, but they can be pricey. The second thing was that I got to put it together.

Gakken is produced by Otonanokagku, and each volume is a different science lesson. The kits have ranged from Theremins to Computers, Cameras, Phonographs and more. Each comes with a beautifully produced magazine that tells the history of the subject that you will be working on. Volume 25 has a great history of film and photography. Because of the popularity of these cameras they are being distributed by Recesky without the magazine, and can be found at Four Corner Store (Check to make sure they have them in stock.) I enjoyed putting it together, but really struggled because the instructions are in Japanese, and as I don’t speak or read Japanese I only had pictures to go from. The focus ranges from approximately 1ft. to infinty, there is only 1 appeture setting (best to use in bright sun), and there is only 1 shutter speed, approximately 1/60.

The great thing about these little darlings is that they use 35mm film, so you can get the film processed almost anywhere. The downside is that the frame is slightly larger than a regular 35mm so it will get cropped unless you have a special scan. But don’t fret, I have customized one of our scanners so you can get the whole frame, you just send your film to Reed Art & Imaging for the processing, proofing and scanning.

Here are some sample images that I have taken with mine. Note that you still get the blurred, vignette edges.

Photograph of a chinese yo-yo taken with a Gakken FlexPictured titled "Jungle Flare" taken with a Gakken FlexPicture titled "Steering Wheel" taken with a Gakken Flex

How to Add More Fun to Your Holga

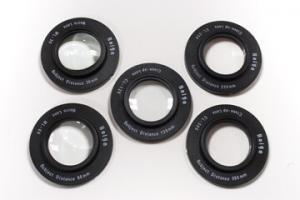
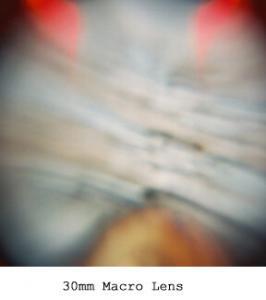
Let’s talk about a fun accessory available for your Holga, the Macro and Close Up lens sets.Lens accessories for Holga toy cameraa These do have to be purchased separately, and they can be found at my two recommended shops, Four Corner Store and Light Leaks. These lenses just slide onto the front of the Holga lens, it is a tight fit so make sure to get them on all the way as it will effect the distance.

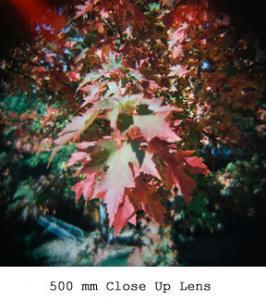
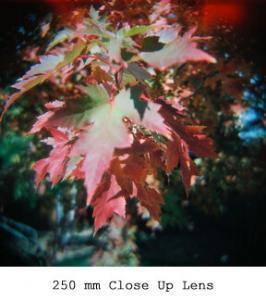
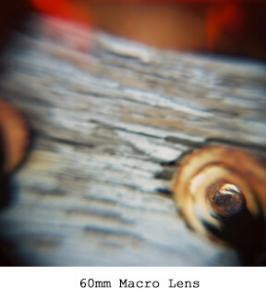
There are 5 lenses, 3 in the Close Up set and 2 in the Macro set. The Close Up set contains a 500mm, 250mm and 120mm. The Macro set contains a 60mm and 30mm. The tricky thing with these is getting the distance. For me it is easier to think of them in centimeters, mainly because I don’t have a measuring device that has millimeters on it. I have experimented with them a couple times and this last time was when I finally got something decent. With the Macro set it has been suggested that a flat object is best, I am still on the fence about that one. When using these lenses it is important to remember that the focusing distance is from the front of the lens. My first attempt, was measuring from the front of the camera. The Holga should be set to infinity when using the close up & macro lenses. Remember when using the Macro lenses because of the short distance the camera could block the light on the subject causing it to be too dark.

If you like Macro and Close Up photography this is definitely something you should add to your collection. Below are samples of what I got over the weekend. Don’t forget to leave questions or comments. Later!

500 mm lens accessory for Holga Camera250 mm lens accessory for Holga Camera60 mm lens accessory for Holga Camera30 mm lens accessory for Holga Camera

He Took a Risk and Landed the Shot

I have a fun story to share with you this week. I like to go out with a friend of mine and we both love take our Holgas. We always have fun and get some incredible shots. The thing I love most is how we will be at the same place, yet see and capture such diverse aspects. For one of our trips I wanted to journey back in my childhood, so we went to the elementary school I attended and a couple of the local parks I used to love going to. I went to photograph the old playground equipment that I used to play on everyday. I decided to invite my friend along to see how his shots might vary from my own, being that I had a emotional tie to the location and he didn’t.

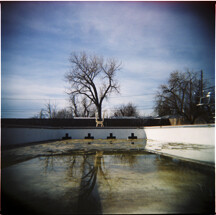
Empty pool in the spring with melted snow runoffWe started the day at the elementary school and then headed over to the local park. The park is right next to a public swimming pool and a skate park. It was April so the pool was still closed for the winter, however, there was some water from melted snow. My friend decided he had to get a picture in the pool, so he jumped the fence to get the shot he wanted. While, I do not encourage or condone trespassing, a great photographer will do what is needed to get the shot. The park was busy with families out and about, it was one of the first nice days of the year, and I was concerned that he would get caught. Before he jumped the fence I told him I would play dumb and pretend I didn’t know him if he got caught, I also told him I wouldn’t pay bail . However, he managed to get in and out without any incident and ended up with a great shot (see left).

Below are a shot I took and a shot my friend took, as an example of how people photograph things differently. My shot is on left.

Geodesic playgroundRed Swing on playground


Have you taken any risks just to get the shot? Tell us your story. See you soon!

Making Videos While Stressing Less and Sleeping More

Once I have my subjects signed up and ready for the shoot, I like to make the most of the opportunity. I plan on at least 30 minutes to one hour on-site. I get as much footage as possible so that I can edit to my hearts content and maybe even get enough for TWO videos. If you have interesting subject matter and talent that feels comfortable in front of the camera, you may have a multi-part series. If your subject is comfortable and keeps on talking….keep on shooting. You never know what jewels you can come up with.

Schedule More Than One Subject Per Day
I find that when I am in my groove and setup for shooting, I can get alot done in one day. I try to schedule more than one subject per day. This allows me to focus on shooting when I’m shooting and editing when I’m editing. Same thing for creating the music in Garage Band.

Setup Private Viewing on YouTube
I upload my videos to YouTube but don’t let them go public until I am ready. Once they have been uploaded, I can take them public anytime I want. So if you want your video to go live on the 15th of the month, change your settings and go live on the 15th. It’s just that easy.

If you have questions or suggestions, please leave me a comment.

Next Time: Making Music in Garage Band